
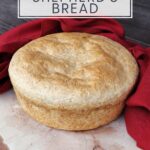

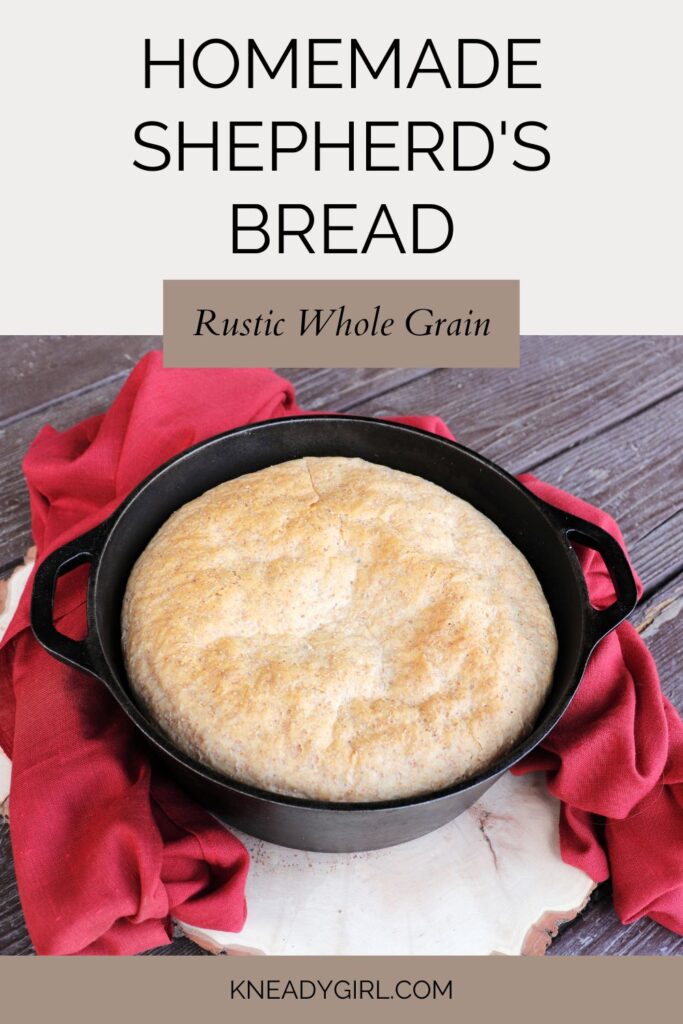
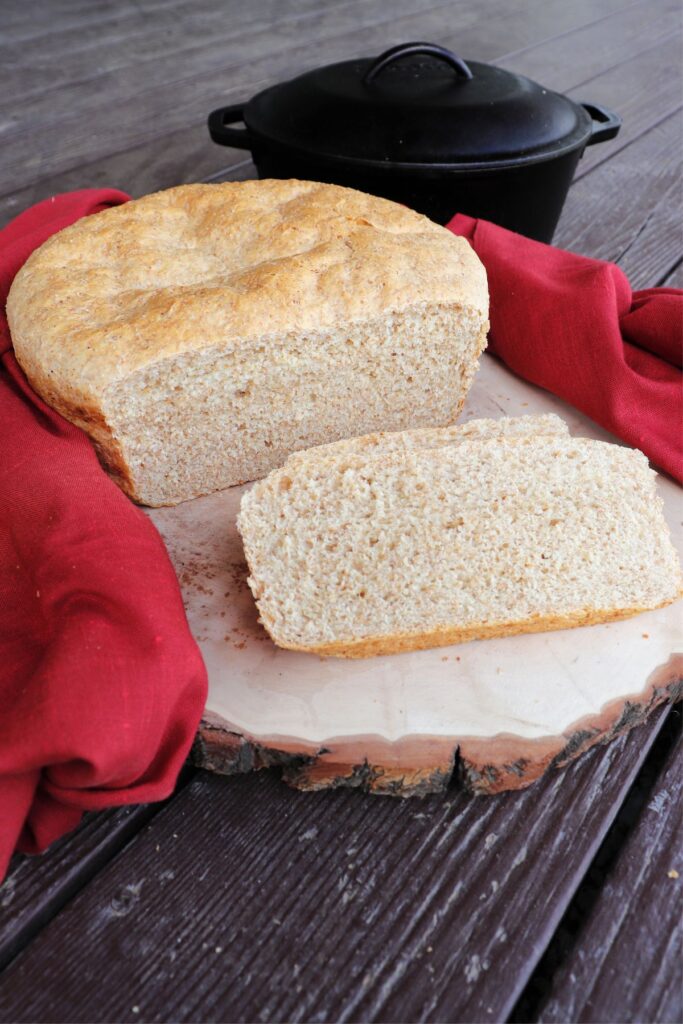
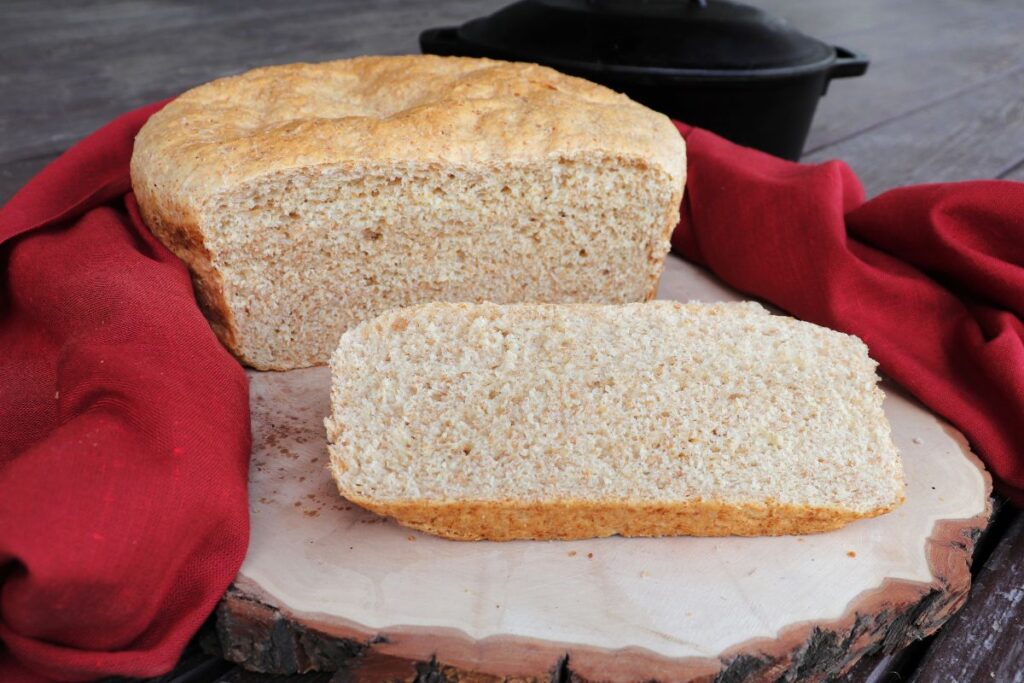
Some breads are all about technique and precision. This one is about simplicity and a good cast iron pot. Shepherd’s bread — also called sheepherder’s bread — is a rustic, wide-loaf yeasted bread with a crunchy crust and a soft, hearty interior, and it’s one of my favorite loaves to bake when I want something substantial without a lot of fuss.
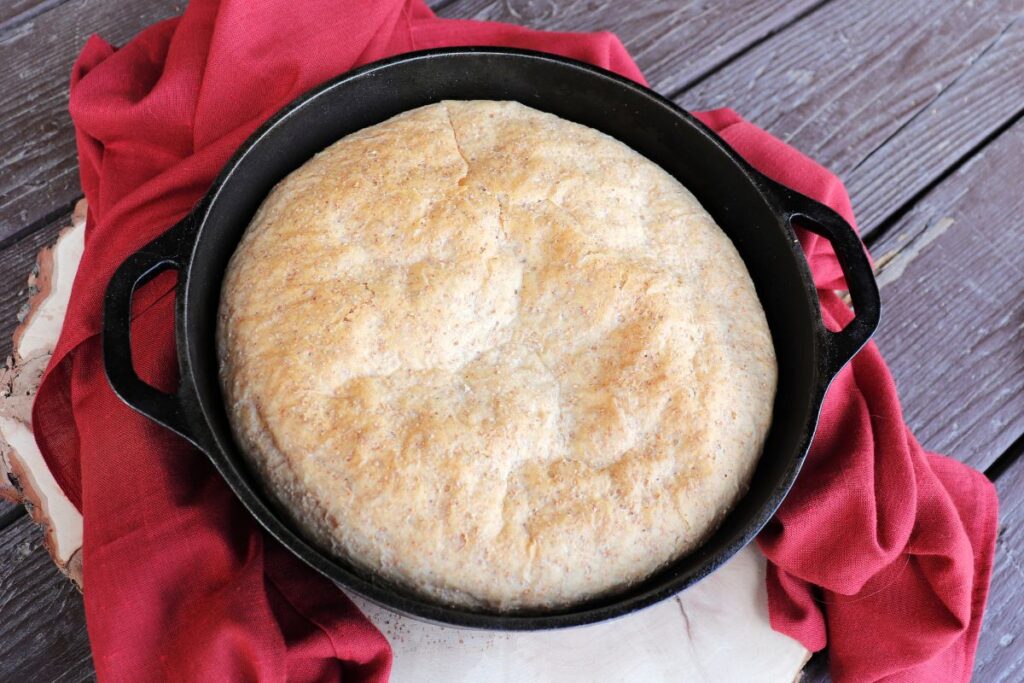
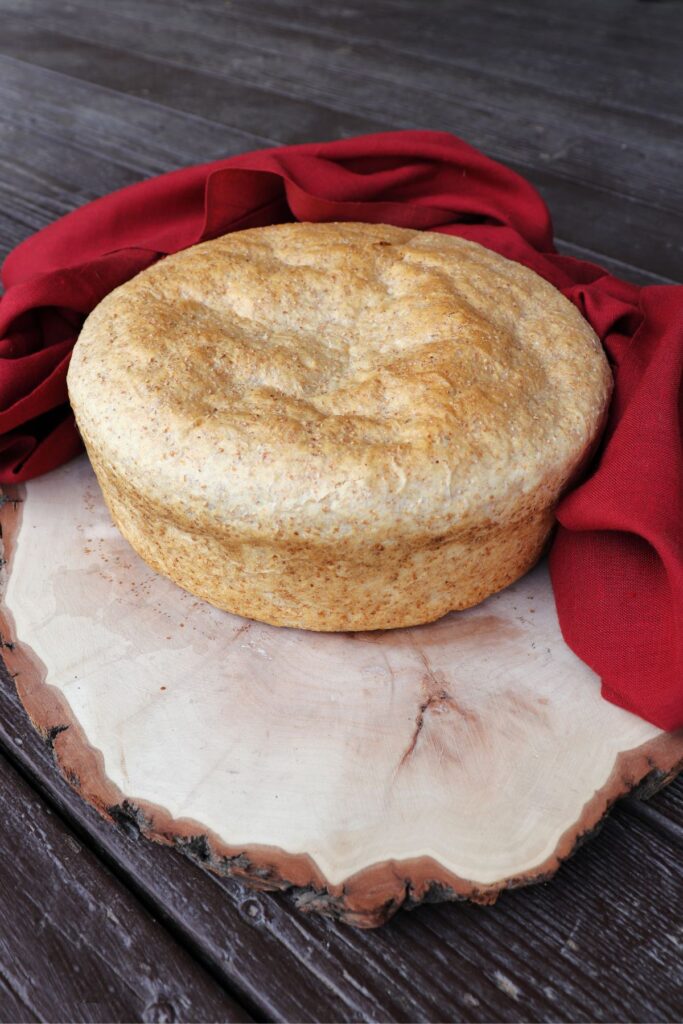
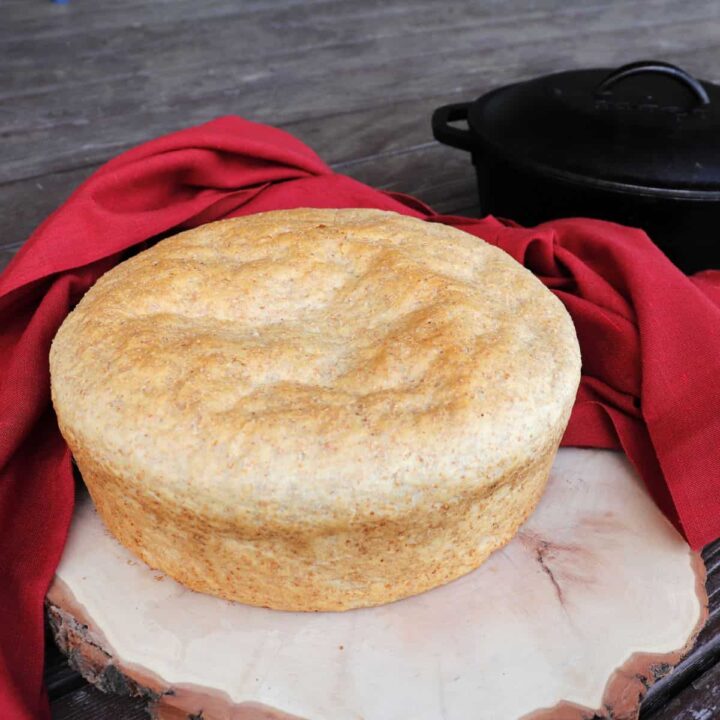
This wonderful bread bakes right inside a cast iron Dutch oven and rises to fill the entire pot, giving you wide, hearty slices perfect for any meal.
A Little History
Shepherd’s bread has roots in Basque sheepherding culture. Herders in the American West would bake this bread in heavy cast iron pots buried in hot coals while out on the range with their flocks. The Dutch oven was practical trail equipment, and the bread it produced was substantial enough to fuel long days of outdoor work. We’re skipping the campfire here, but the cast iron pot and the big, rustic loaf are very much still part of the tradition.
Flour Choices
The original recipe as written uses a mix of whole wheat and bread flours for a lightly whole grain loaf.
It is not a heavy or dense whole grain bread, it will remain light enough in texture that most anyone will enjoy.
All-purpose flour could be substituted for the bread flour.
Other whole grain flours could be substituted for the whole wheat, I’ve tried it with medium rye and pumpernickel flours myself. In the end, I’ve preferred whole wheat here.
Skip the whole grain and use 100% bread or all-purpose flour if desired.
Do know that different flours absorb water differently so add flour slowly to see how the bread dough forms as you mix. If you enjoy baking with whole wheat flour, my Whole Wheat Italian Bread is another great everyday loaf worth trying.
The Dutch Oven
Traditionally, these lovely Basque sheepherders bread loaves are baked in round cast iron Dutch ovens. The iron pots would stand up to cooking over a fire or being buried in hot coals.
We’re going to skip the fire and do it in the oven here!
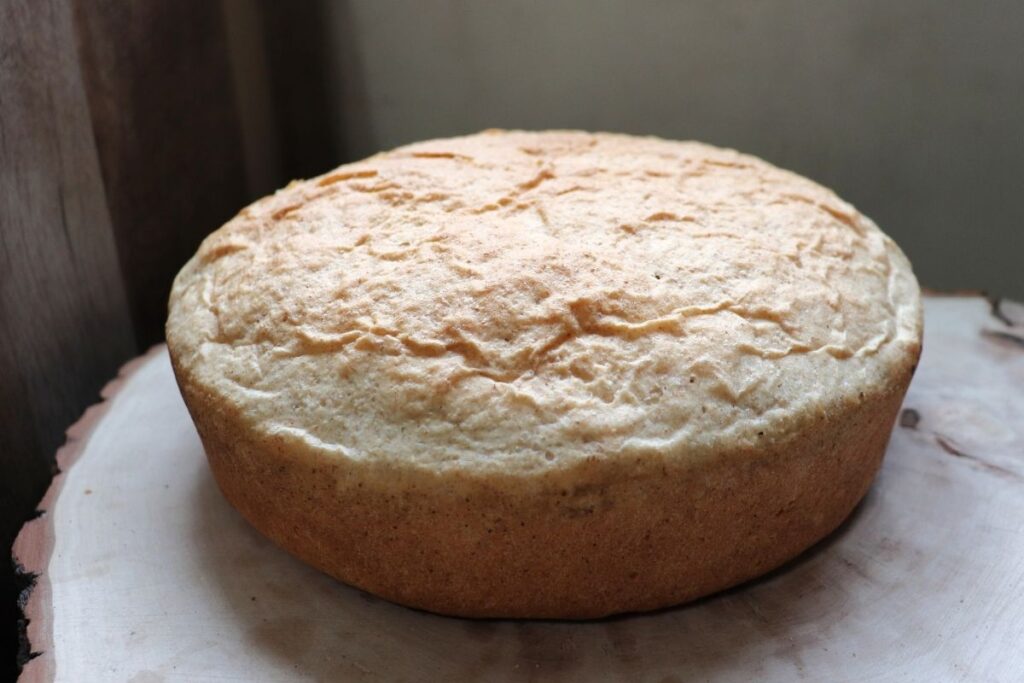
The baking in the Dutch Oven with the lid on, is what gives this bread such amazing texture. A crunchy crust with a soft interior is possible because it steams a bit while it bakes with the lid on for the first few minutes.
You’ll need a minimum 5-quart cast-iron Dutch oven for this recipe. Larger will work, but smaller will likely cause the lid to be completely pushed off by the rising dough.
Make sure to grease the lid before baking. The bread dough will rise to touch the lid while baking and if it sticks it’s a mess.
It is when the dough pushes on the lid that gives the top a dimpled or wavy appearance. To me, that only enhances the appeal of the loaf.
Don’t have a Dutch Oven? Any deep round pot with a lid would likely work. As stated, just be sure to grease the inside of the cover.
Change Shape
Want to buck tradition? Like most bread doughs, there’s no reason why different shapes couldn’t be made based on the mood of the baker.
I didn’t test it but I don’t see why it couldn’t easily bake up as a round loaf on a baking sheet.
Divide in half and place each half in a loaf pan.
Baking time will vary for different shapes, so watch for doneness.
Experience Level: Beginner
This is a simple bread that most beginning bread bakers could tackle.
There’s a just a touch of whole wheat flour making it a great recipe to get some experience with whole grain flours.
Beyond the whole grain the only difference in making this basic bread recipe is the pan, allowing for some creative exploration.
Troubleshooting
The lid got stuck to the bread. This happens when the lid wasn’t greased well enough before the second rise. For next time, grease the lid generously — butter, shortening, or cooking spray all work. If it sticks, let the bread cool a few minutes before gently working the lid free; the bread usually releases cleanly once it contracts slightly as it cools.
The dough pushed the lid completely off. Your Dutch oven may be too small. A 5-quart is the minimum for this recipe. If you only have a smaller pot, divide the dough and bake in two batches or use a different vessel.
The crust is soft instead of crunchy. Make sure you’re removing the lid after the first 12 minutes of baking. The crust develops during the uncovered portion of the bake. Also make sure the bread cooled on a wire rack rather than in the pot: trapped steam will soften the crust quickly.
The bread didn’t rise well. Check your yeast first — if it didn’t foam up in the water during the first step, the yeast is likely dead and the bread won’t rise. Water temperature matters too: too hot kills yeast, too cold won’t activate it. Aim for warm but comfortable to the touch, around 105–110°F.
The interior is gummy or undercooked. Tap the bottom of the loaf — it should sound hollow. If it doesn’t, return it to the oven for another 5–10 minutes. An instant read thermometer inserted into the center should read 190–200°F when fully baked.
How to Serve
This recipe results in a wide loaf — you’ll want a long bread knife to slice it well. Other than that, use it like any favorite savory bread.
Serve slices alongside soup and stew. It’s especially good with a hearty meal like Cabbage Roll Soup. The thick slices are made for sopping up a rich broth.
Cut the long slices in half and toast in a toaster oven to slather with peanut butter or jam. Use it with any main dish that has a sauce worth sopping up.
How to Store
If stored in an airtight container, this bread will stay fresh at room temperature for about 4 days.
For longer term storage, freeze baked and cooled loaves in freezer bags.
Alternatively, bake and cool the bread, then slice. Place slices in freezer bags and freeze.
I prefer the slice method for this bread, because it’s easy to just pull out a few slices and toast quickly for breakfast.
Use up frozen bread within 6 months for best flavor and to prevent freezer burn.
Shepherd's Bread Recipe
Make this hearty, rustic loaf as an amazing way to complete most any meal where bread is welcome.
Ingredients
- 2 Cups Warm Water
- 1 Tablespoon Active Dry Yeast
- 1 Tablespoon Sugar
- 6 Tablespoons Salted Butter, Melted & cooled to room temperature
- 2 teaspoons Salt
- 2 Cups Whole Wheat Flour
- 3 1/2 Cups Bread Flour
Instructions
- In a large bowl, combine water, yeast, and sugar. Let sit until foamy - about 5 to 10 minutes.
- Add the whole wheat flour, melted butter, and salt. Stir well with a wooden spoon to form a thick batter.
- Add 2 cups of the bread flour and mix. Continue to add the remaining cups of flour a bit at a time until a soft dough begins to form.
- If using a stand mixer with a dough hook, mix on medium speed. The dough will begin to clean the sides of the bowl.
- Turn the dough out onto a floured surface and knead until it an elastic and smooth ball.
- Grease a large mixing bowl, place the dough inside turning to coat.
- Cover bowl a clean towel. For the first rise, let sit in a warm place until doubled, 45 minutes to an hour.
- Grease a dutch oven, including the lid.
- Punch down the bread dough and turn out to a floured board.
- Knead and shape the dough into a large disk.
- Place dough inside the dutch oven. Cover the pot with the lid.
- Let dough rise for a second time in a warm spot until doubled, about 30 minutes.
- Meanwhile, preheat the oven to 375 degrees Fahrenheit.
- Place the dutch oven in the preheated oven with the lid on.
- Bake for 12 minutes.
- Remove the lid and bake for another 25-30 minutes more.
- The bread will have a golden brown crust when done. The center of the loaf will sound hollow when tapped with a knuckle.
- Remove from the pan immediately to cool on wire rack.
Nutrition Information:
Yield: 26 Serving Size: 1Amount Per Serving: Calories: 125Total Fat: 3gSaturated Fat: 2gTrans Fat: 0gUnsaturated Fat: 1gCholesterol: 7mgSodium: 185mgCarbohydrates: 21gFiber: 2gSugar: 1gProtein: 4g
I try but cannot guarantee this nutritional information is 100% accurate.

I like to use this type of bread as a base for dips like spinach dip or artichoke Jalepeno parmesan. The slices also make an interesting open faced sandwich for chicken or tuna salad, pimento cheese. Or if you’re like my youngest daughter, just eat it plain or with a little fresh butter.